Learning in the Nestled Garden begins immediately at the fence.
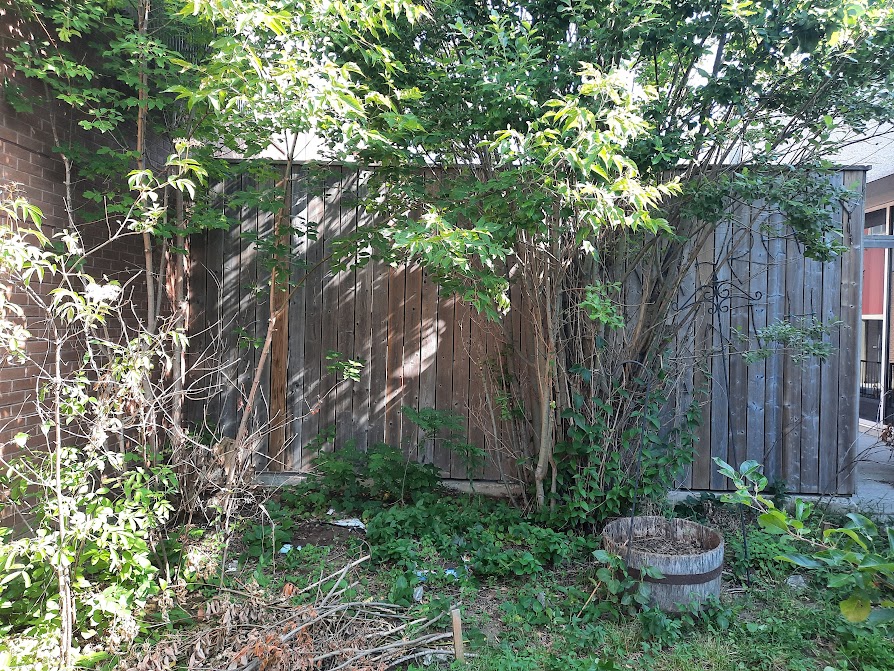
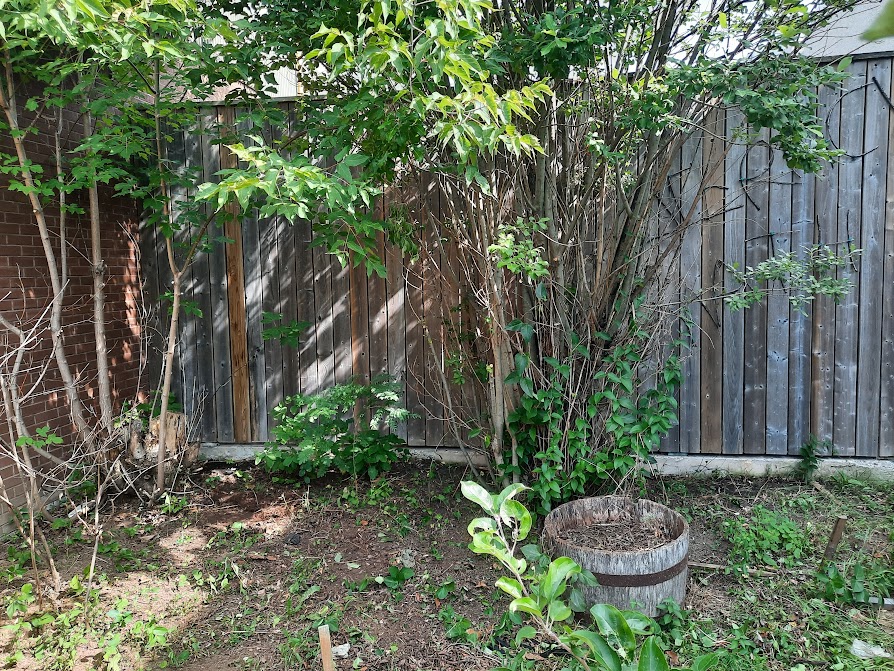
Learning in the Nestled Garden begins immediately at the fence.
There are many gardens around Duncan MacArthur Hall with a variety of purposes: the ornamental gardens along the sidewalks are run by Queen’s facilities, and the gardens in the courtyard which feature native plants that support local biodiversity and are used by the ITEP program to Indigenize education.
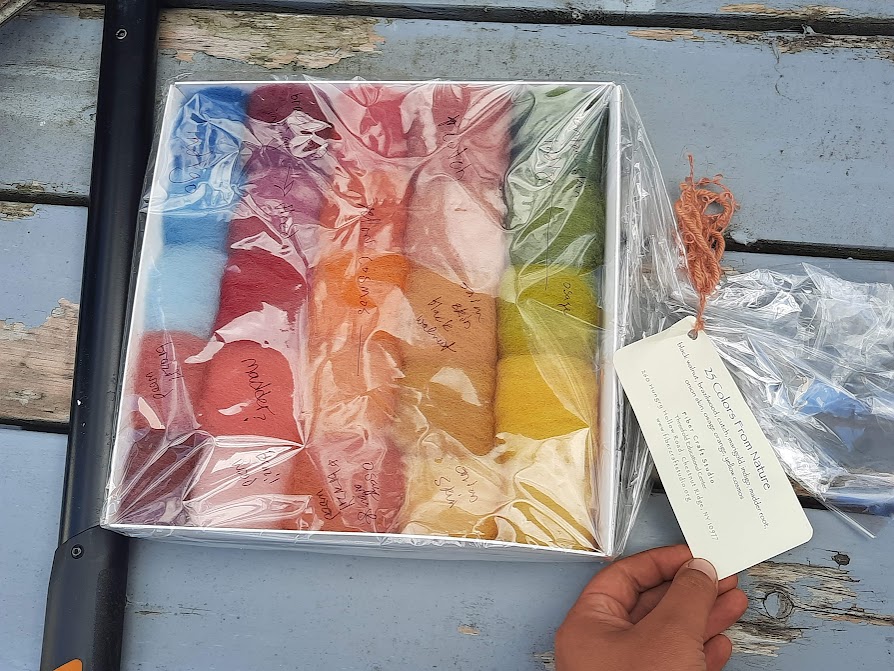
The gardens run by OEE are functional gardens, so every plant has a specific human use. The flowers that we plant, in addition to being pretty and deterring some pests, get used in the fall to make natural dyes. The pictures on the right are examples made/used by the program coordinator as they practice and promote Waldorf School theories.

Full colour flowers make the best plant dyes, so flowers should not be left to dry out on the stem. Instead, pluck them when they are full colour and save them in species-specific freezer containers.
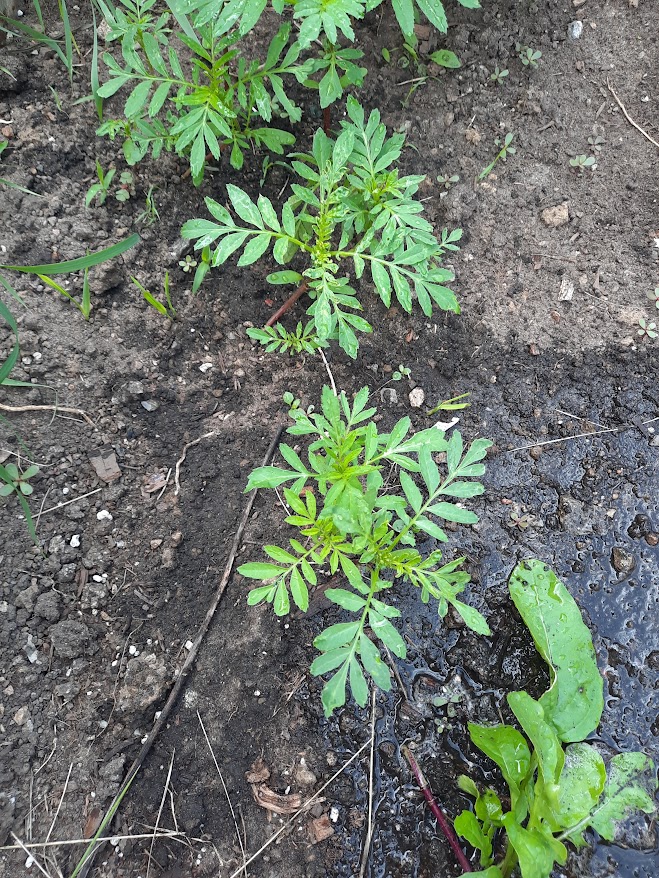
The amaranth seedlings took about five days to emerge when planted mid-July. The vegetative state followed very quickly.

Black hollyhocks are a perennial plants that benefit from air circulation and stalks. They are planted in one of the barrel planters to prevent them from shading, and being shaded by, the food crops, and to make staking easier.
The black hollyhock seedlings took about two weeks to emerge, but were quite large when they did.


The seed pack used was only labelled “chamomile”, so it is unclear (as of yet) if it was Dyer’s Chamomile (Golden Margeurite), or German Chamomile, though it was likely Golden Margeurite not German, because German is used for teas not dyes and the seeds are meant to be for dyeing.
The chamomile seedlings took about two weeks to emerge when planted mid-July.

The calendula seedlings took one to two weeks to emerge after planting mid-july.


Coreopsis flowers are native draught resistant flowers that love full sun. The most maintenance they require is regular deadheading to ensure constant blooms throughout the year!
The ’24 OEE class planted marigolds throughout the main beds in the neslted garden and in one of the barrel planters. Marigolds help deter pests, and can be used to make yellow to orange dye.

Nasturtiums are an edible flower often added to salads – they have a bit of a peppery kick like radishes. Some people don’t like the taste, so they can also be made into red, yellow, and orange dyes. Nasturtiums have distinct lilly-pad like leaves and long stems. Try planting near the edge of beds so they can spill over without taking up like from the other seedlings.

Dyer’s woad is a historically popular plant around south-eastern Europe because of the strong blue pigment in its leaves. After it is established in its bed, it will grow clusters of small yellow flowers that become green hanging seed pods. The plant has become invasive in parts of Western Turtle Island, so the seeds should be collected to prevent it from taking over the nestled garden. It is the only plant planted in the triangular garden bed, which makes weeding in that space easy.
Many of the plants that were not planted deliberately are still beloved, and some were planted deliberately but have since made the space their own with little maintenance! These plants can be removed if they become intrusive and take resources away from the deliberate plants, otherwise leave them to encourage plant diversity and attract pollinators.
Milkweed is an essential plant to monarch butterflies because monarch larvae will only eat milkweed leaves! The pollinators lay their eggs on the underside of the plant’s leaves. When the eggs hatch, they begin munching on the thick, elliptical leaves.
Milkweed plants emerge throughout the garden beds and in the grassy areas between. The stalks features opposite leaves that grow in pairs. The five-petalled flowers emerge in clusters and range from white to oragne to purple.


Horsetail is an edible plant recognizable by it’s hollow stem and absence of leaves – instead, it has green “branch-like” arms that photosynthesize. The plant is a member of the fern family, and is known to have emerged in the Jurassic era! Some people claim teas and balms help with kidney and bone health; however there is little research into medicinal uses. Remove the plant from beds, but you can leave some around the space.
Lemon balm originated in Europe. It is a delicious herb that can be added to tea, lemonade, and salads for a refreshing boost!
Lemon Balm was planted in the garden on purpose once, but now reminds us that mint family plants are hardy and come back every year so they must be planted in containers not beds. We moved some to a pot for continued harvest, so please dig out what you see in the ground to prevent it from taking over!

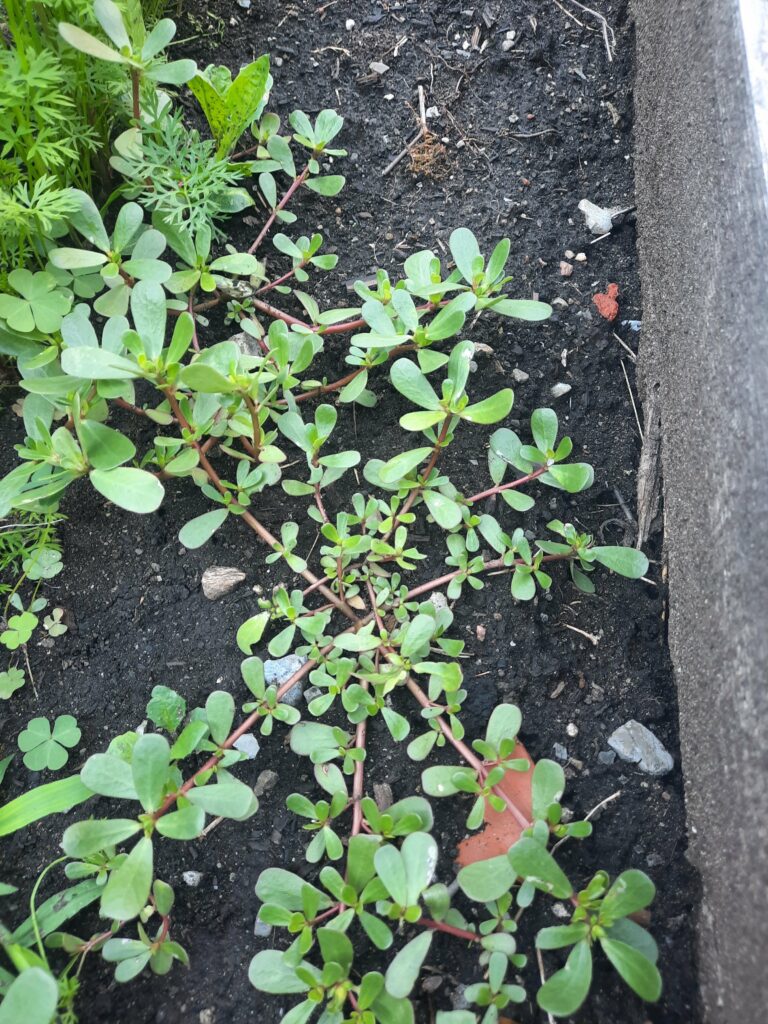
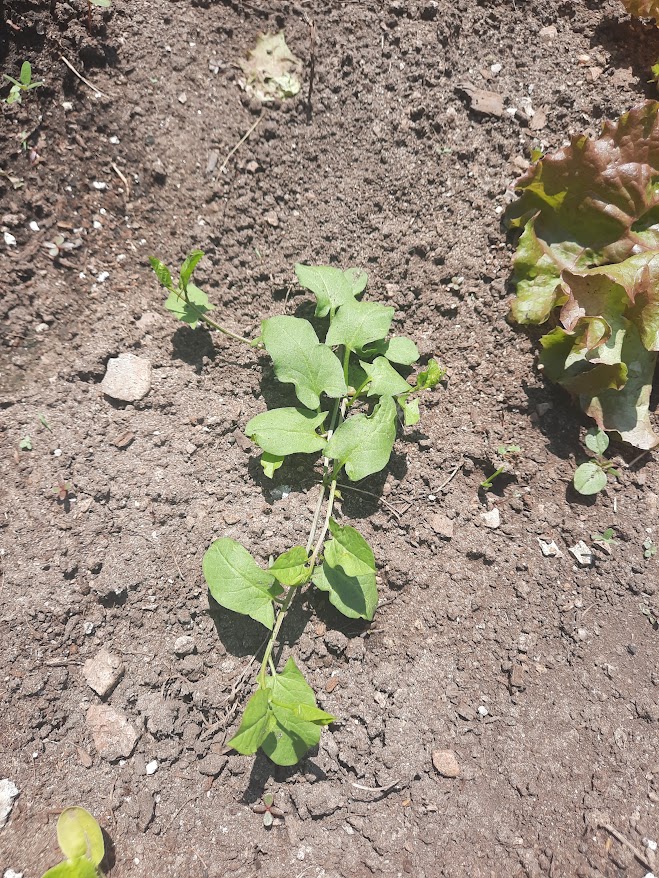
Common purslane is an edible, non-native plant present in all nestled garden beds and planters. Unlike many of the planted plants, common purslane takes some time to visibly develop its tiny, red “leaved” babies with shallow roots, but, once established, it grows quite quickly like the left image.
Though it doesn’t suffocate other plants like Dog Strangling Vine does, if you’ve planted densely you may want to give the ground space and water to the intentional plants. The shallow roots make this easy to pull; however, the seeds can remain dormant for up to 10 years so it will be back next summer!
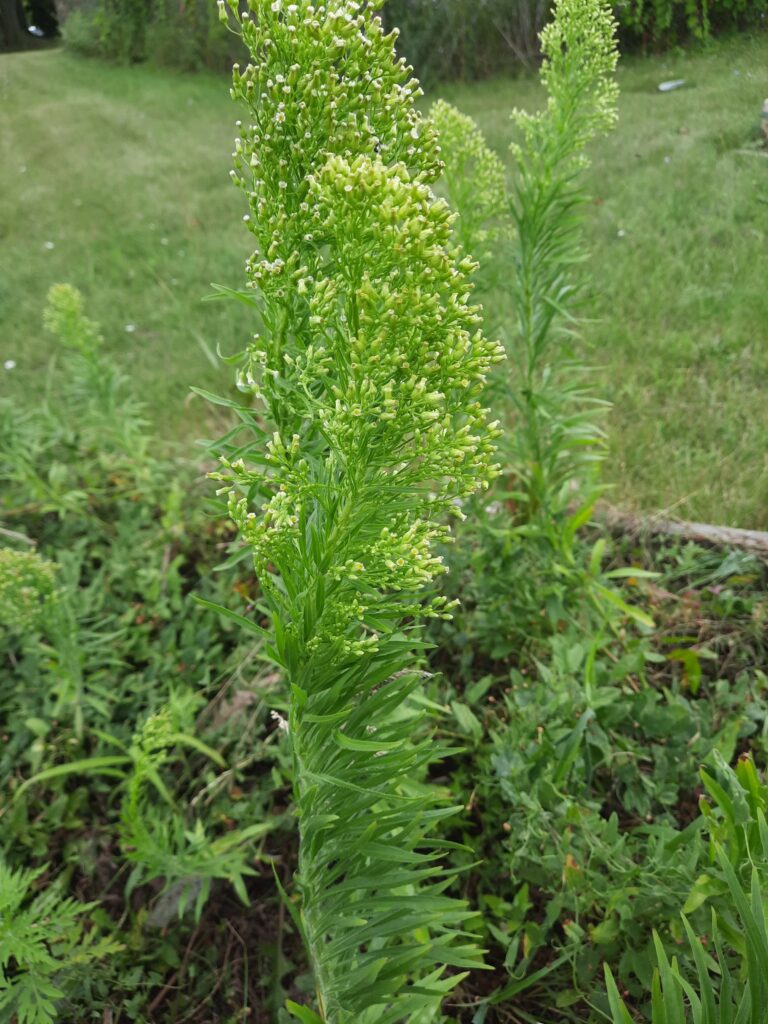
Horseweed is a native plant common throughout the territories of the Anishinabewaki, Odawa, Algonquin, Mohawk, Onandaga, and Cree peoples. The young leaves are edible, and can be boiled or dried to add onion-y, tarragon-y flavors to foods.
Some consider horseweed to be a garden nuisance because of its high water demands and aggressive, wind-spread seeds; however, horseweed attracts many pollinators. To balance the pollinator attraction and seed aggression, try letting some plants go to flower and pull all plants before they get to seed.
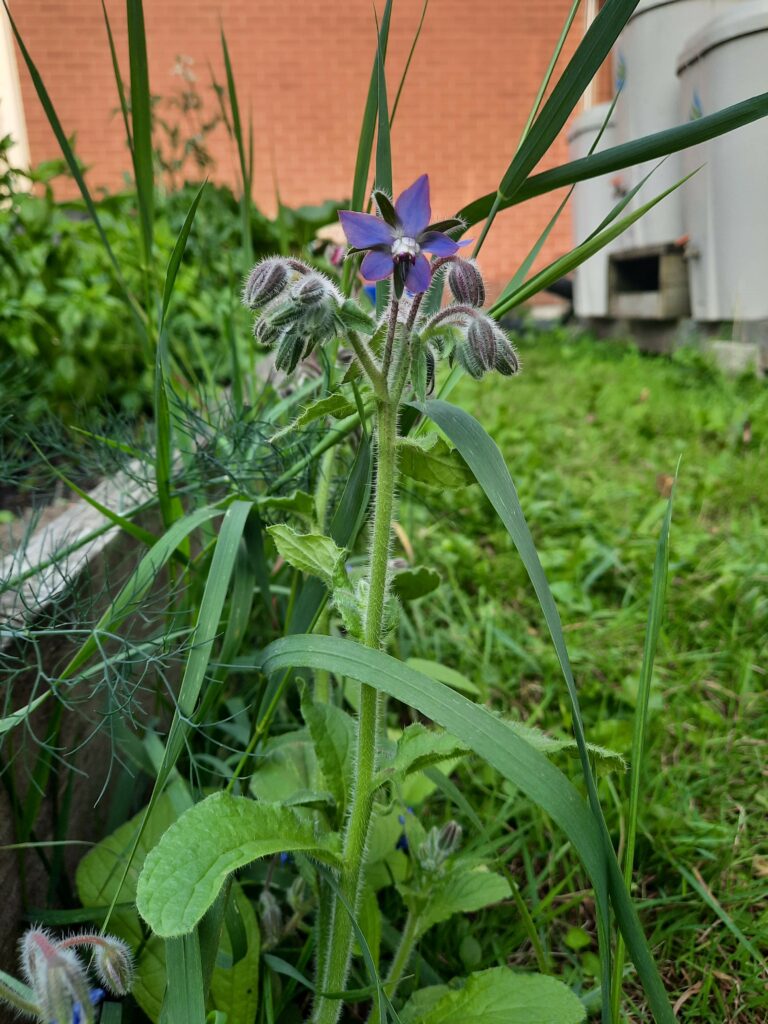
Borage, or starflower, is a common and resilient plant that comes back every year! Though originated in Europe, it does not outcompete against native plants, and attracts native pollinators, so it is not considered invasive. It’s considered a great companion plant to tomatoes because it deters hornworms.
While it does have tasty leaves and is often considered an herb, borage should not be eaten in large quantities, especially if pregnant!

Planting in the beds began in the third week of June; however, OEE ’24 students started tomatoes and peas in April, STEM students planted various herbs in the pots in April, and the coreopsis and black hollyhock returned from 2023.
The seeds sown directly in the ground have 50-70 day growth spans, so they should be harvestable by the end of September. To increase variety in future years, begin direct sowing earlier or start more seedlings, such as peppers, in the Spring term.
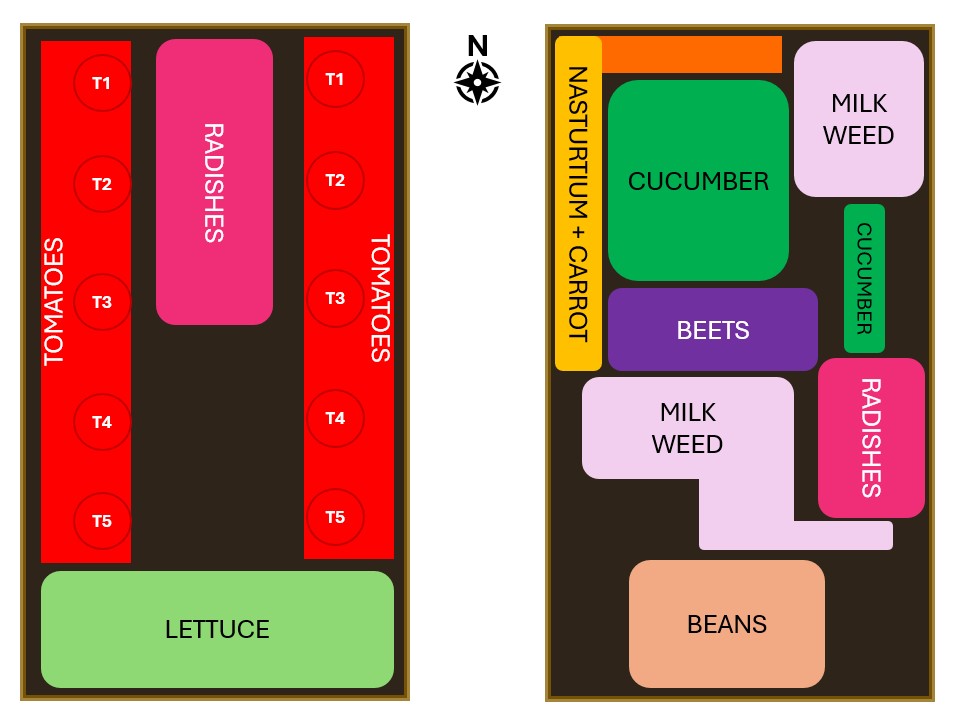
We also focused on the Nestled Garden to prevent over committing and to continue the expansions efforts throughout the year. We planted:
Hilltop
Nestled
| Plant | Dye Colour |
| Aramanth | Pink |
| Chamomile | Yellow |
| Coreopsis | Yellow-Orange |
| Indigo | Blue |
| Marigolds | Greenish Yellow – Yellow – Orange |
| Weld | Yellow – Green |
| Woad | Periwinkle – Blue |
Garden cleanup happens after first practicum. During the session, consecutive students (concurrent do not join until September) clean up garden beds and planters to prepare them for planting. Some beds will be so overrun by weeds that it’s not worth trying to salvage remaining plants from last year, but others will have established plants that you need to work around, such as milkweed that attracts butterflies and woad which takes 2 years to seed! Below, I highlight some of the plants and creatures that must be removed because they will choke and kill your vegetables!
While digging, you might come across sponge moth cocoons. Pop them! If you, like me, are nauseated by the idea of popping with your fingers because they will spray you, put them on a hard surface and stomp them, or find a peer to do it.
Spongy moths are invasive; They originate from Europe, North Africa, and Asia and destroy local plants by eating their leaves. Their populations have been controlled and/or removed in most provinces, but they are still present in Ontario and Quebec.
Do not be fooled by their name, grub worms are not wiggly friends with no legs! They are actually the larval stage of many beetles, and are recognizable by their orange head, creamy body, and legs at the front of their body. Not all grub worms are invasive, but they are all damaging to your garden! One type of grub worm is the larval stage of the native June beetle, but others are the larval stage of the invasive European Chafer and Japanese Beetle.
To kill grub worms, remove them from the garden and place them on a hard surface. Stomp them.
Loosen the topsoil with a spading forks and start pulling out the plants. Be sure to keep as much soil as possible in the beds by shaking out the entangled roots. Then, once the soil is shaken out, place the plants on a tarp so they can dry out. Do not just leave on the ground! They will re-root and start growing again. One the visible plants are removed, use a hand cultivator to brush through the soils and expose the long, deep grass roots that will we grow if left untended!
Field Bindweed is an invasive plant originally from Eurasia that was introduced to Ontario as an ornamental plant. Field bindweed is aggressive in the gardens; it grows deep, long roots (we found roots over 2′ long) that can be dug back to nest-like growths, and the vines with crawl up and choke out your crops. If you find some, you will likely end up digging up most of the garden bed to remove the ropey roots.
Be mindful of field that grows outside of the garden bed: the roots grow under the soil and up through the bed, and the plants extend over the barriers and pull down crops. Without trellises, the vines radiate from a central root and stay low to the ground, so they are missed by mowers and weed whackers. To locate field bindweed in the grass and prevent it from reach under or through te beds, or from spreading seeds, locate it with the white, cup-like flowers and trace the vine back to the central root.
Be sure to remove field bindweed as you see it while watering or going by the gardens because it grows very quickly!


Not all of the grasses on campus are invasive grasses, but they are all annoying in garden beds and tough to remove. Unlike Japanese Knotweed, grasses have thin, dense roots that makes it difficult to save the soil. When removing grass, use a spading fork to get below the surface roots and lift. Then, you can pull large chunks at a time and shake the soil out of their roots
Stinging nettle can be found all across Canada and is not invasive! It is up to you to decide if the benefits outweigh the discomfort, and to consider how keeping the plant contained affects your decision. Stinging nettle has hairs along the stem and underside of the leaves, which, when brushed up against, cause immediate stinging sensation followed quickly by raised welts. Over a few hours the welts usually become red-ish before fading away. The stinging sensation, depending on the exposure, can last a few minutes to a couple of days.
With careful handling, stinging nettle leaves can be boiled for a tea rich in vitamin C, and the stems can be made into cord!
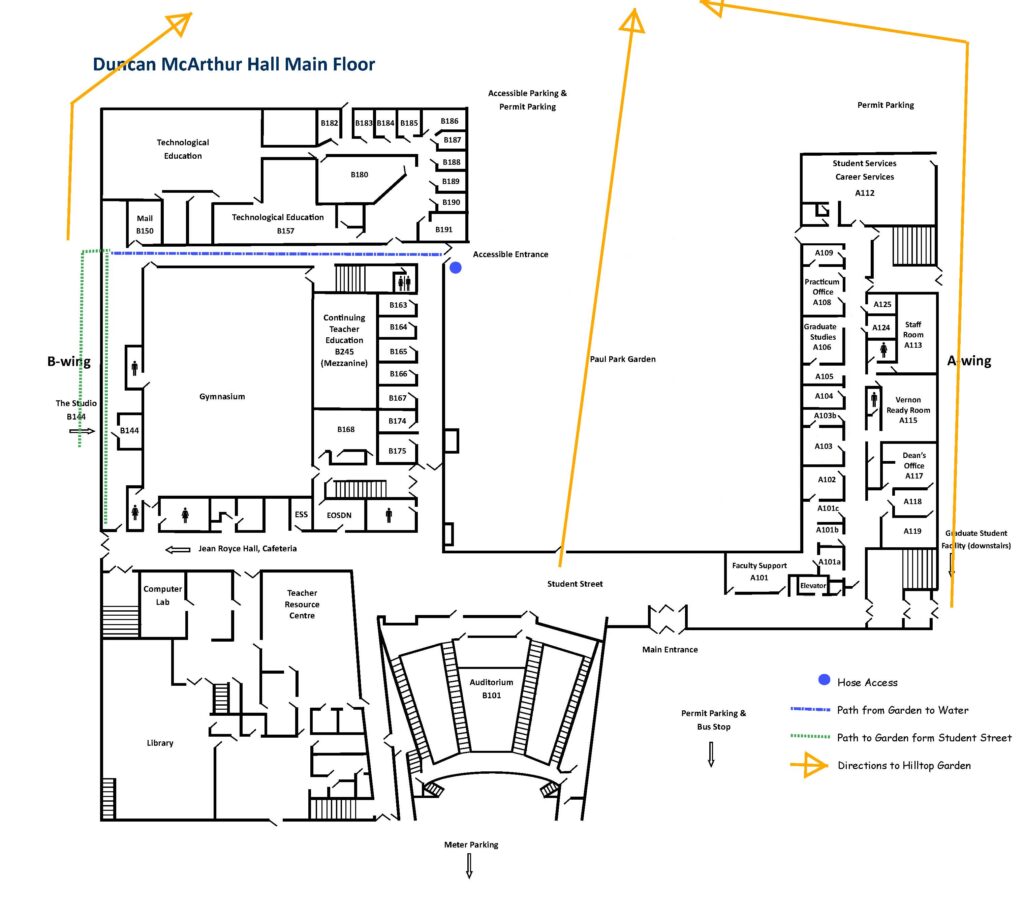
The nestled garden is not directly accessible from the building because doors are often locked. Instead, go down the hallway The Studio is in, out the left hand doors, and through the gate. There are three large rectangular beds, a small triangular bed, and many window boxes and other containers.
Because of the surrounding buildings, the nestled garden receives ample shade in mornings and evenings, and harsh direct sunlight midday.
There are three active rain water collection barrels in the nestled garden. Before watering, be sure to check the right hand rain barrel and empty from it first because it receives the run off water from the middle rain barrel. If (when) the water in the middle rain barrel runs out, water must be collected.
During Summer months, Kingston experiences drought-like conditions. Because of this, the water collection barrels will run out ~weekly with consistent bed watering. To refill the water beds, email edhelp@queensu.ca at least one day in advance to secure a cart to help move water.
During the organized window, bring available empty buckets inside to the cart and wheel it through the Tech Ed hallway and out to the Paul Park Garden breezeway. Locate the hose immediately to the right of the doors and fill the buckets. Then, push the loaded cart back across the hallway and carry each bucket through the doors. Empty the buckets into the rain barrels.
I recommend leaving the cart halfway through the second set of doors so you don’t have to pull the full cart over the lip while also trying to hold the door open for yourself. I also recommend assigning this weekly task to a team of 2-3 people so they can set up a regular time to have the cart available.
*these instructions were written before knowledge about the hose beside the ITEP gardens*
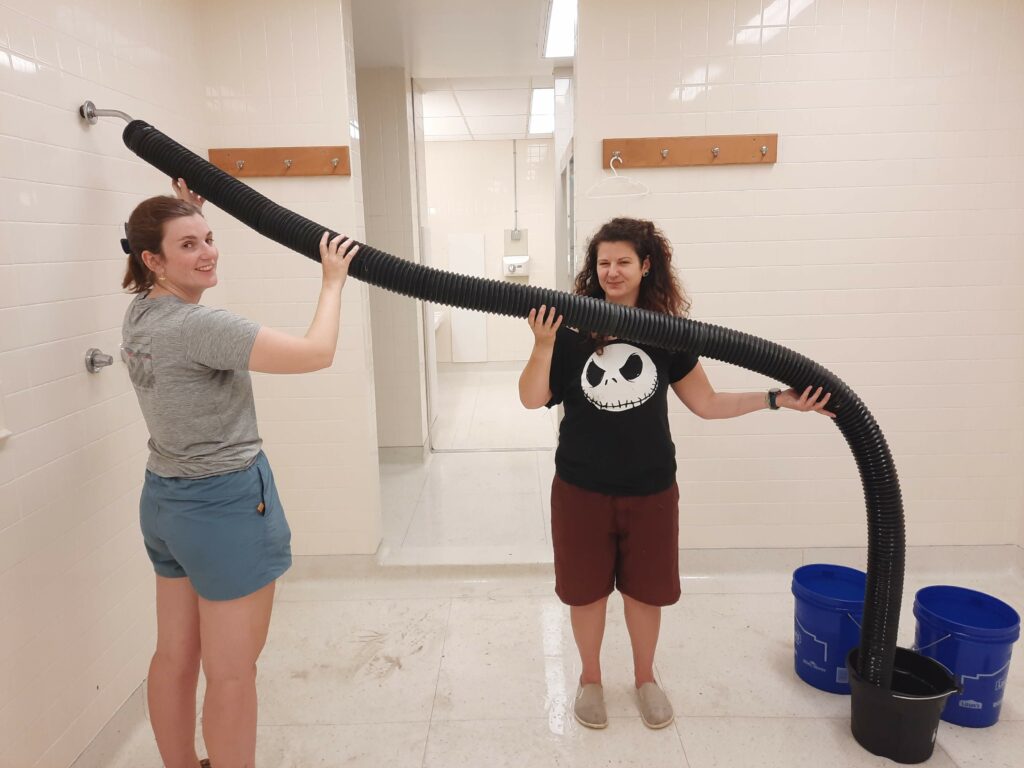
To collect water from indoors, first collect a few buckets and a large tube from beside the shed. The, navigate to the change rooms inside. The large tube fits over the shower head, but has a toonie-sized hole in it so you must be mindful of how you hold it while filling buckets. Use the door that attaches to The Studio hallway instead of carrying buckets through the gym and along Student Street.
The hillside garden has multiple water barrels; however, the rainwater collection is currently broken. During first session, be sure to fill the barrels with the hose beside John Orr Tower. Always make sure to return the hose and ensure it is packed away nicely! The program can lose water access privileges if it is damaged or put away messily.
The hillside garden features 8 garden beds, and two of them are reserved for other Queen’s community use. Because of rock base, the garden beds are shallow, so we recommend planting fibrous root vegetables such as pumpkins and corn, instead of taproot vegetables such as carrots.
© 2025 Queen's B.Ed '24 OEE Blog
Theme by Anders Noren — Up ↑
Recent Comments